£14.90
Power-Free
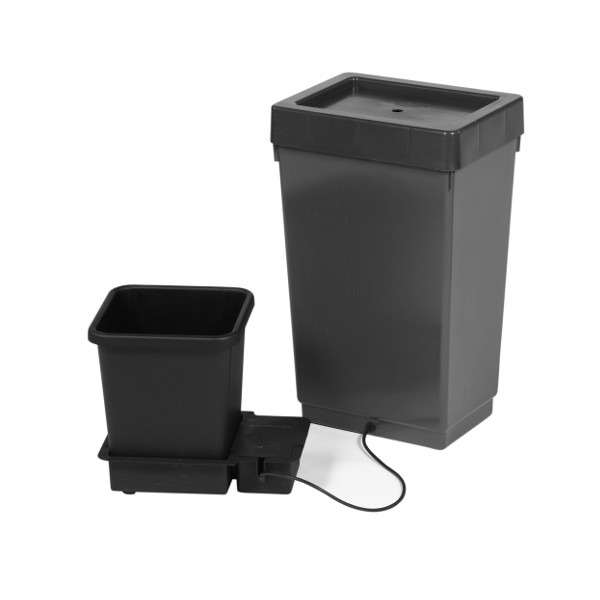
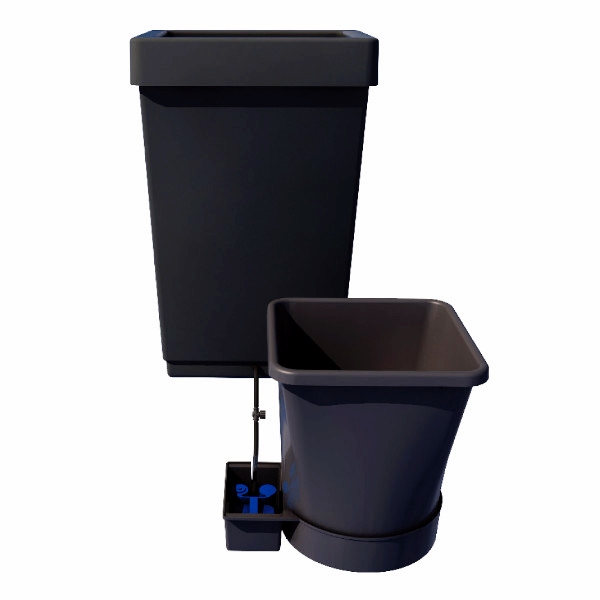
Once connected to the water supply, the AQUAvalve in every AutoPot Watering System controls the flow of water to the plants by simple gravity pressure from a reservoir of any size. No pumps, mains water pressure, electricity or timers are ever required.
Plant Controlled
AQUAvalve is an exceptionally responsive means of feeding. It opens to supply water to a 20mm depth and then closes. Once the plants have used that supply the AQUAvalve reopens to repeat the cycle. No need to second guess plant requirements, compensate for conditions or recalibrate unnecessary pumps or computers.
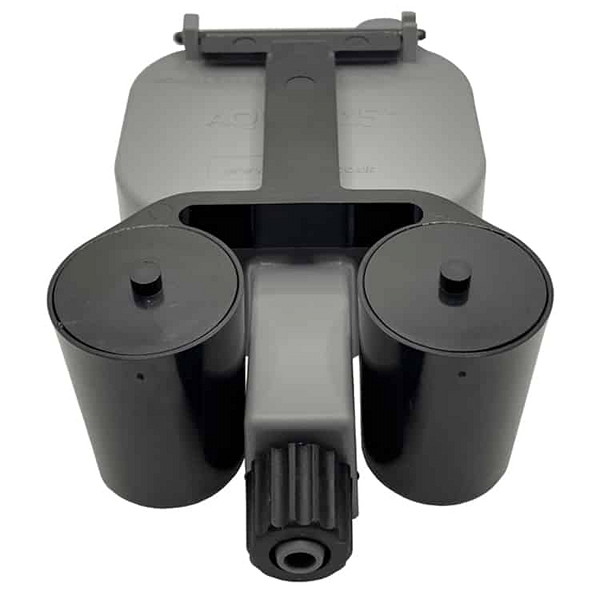
AQUAvalve5 – a 66% Bigger Inlet
The needs of growers are ever-evolving, served by an increasingly diverse range of nutrients. With a 5mm inlet, the new AQUAvalve5 rises to the challenge of delivering the widest range of nutrients in a faster flow for a quicker fill, maximising system efficiency. Maintenance is reduced and the risk of blockages minimised.
Compatibility
AutoPot Watering Systems, System Modules, and Watering Kits are now supplied as standard with the large-bore AQUAvalve5 and with 9mm, 9-16mm, and 16mm pipework and fittings.
The original AQUAvalve, the 6mm pipework and 6mm fittings previously supplied with the AutoPot range are still available as spares, as are 16mm-6mm fittings.
Your existing 1Pot, XL, XL SmartPot, and easy2grow trays, pots and lids will accommodate the new AQUAvalve5, the 9mm fittings and 9mm pipe. The design of these is unchanged.
Newly sold Tray Systems, AQUAbox Straight, AQUAbox Spyder, and 47L/30L Tanks are drilled out to accept 9mm pipe and fittings.
Your existing Tray System, AQUAbox Straight, and AQUAbox Spyder will fit AQUAvalve5 but will need existing holes drilling out to 12.5mm. Use a 9mm Grommet and 9mm Golf Filter to run 9mm pipe required for AQUAvalve5.
Your existing 47L/30L Tanks need existing holes drilling out to 12.5mm. Use a 9mm Grommet and 9mm Golf Filter to run 9mm pipe required for AQUAvalve5.
FlexiTank and FlexiTank Pro Couplers are unchanged. Only in the event of connecting directly to 9mm pipe do they require the new 16mm-9mm Filter and Adapter.
Choose AQUAvalve5 for 9mm pipe and fittings
The AQUAvalve5 is a simple but very effective watering device but needs to be treated with care. Keep the AQUAvalve5 and the tray it sits in clean, free of obstructions, soil particles and it will help you water & feed your plants for many years. The AQUAvalve5 is guaranteed for 12 months.
Ensuring that the AQUAvalve floods and drains correctly
• Ensure the two silicones are in place. Hold the AQUAvalve at eye level so that you can see the silicone fitted to the top float resting on the
hole below it. The silicone must create a tight seal when touching the hole. If it looks like it is not sitting parallel on the hole below, simply
lift the top float and apply pressure to one side of the silicone, drop the float and hold at eye level again. Repeat the procedure if necessary.
• Ensure the AQUAvalve is secured to the tray. If using AutoPot trays position the half-moon on the bottom of the AQUAvalve over the
T-section in the tray, push down firmly on the main body only. If using in a garden tray place an AQUAvalve Cover over the AQUAvalve.
Cleaning
• AQUAvalve is easily disassembled. Held vertically the top float will slide all the way across. The bottom float unclips from its pivot position.
• Ensure that silicones are removed from the AQUAvalve before cleaning and are only replaced when the AQUAvalve is completely dry.
• AQUAvalves can be scrubbed using a toothbrush or even placed in the dishwasher.
• Blowing through the AQUAvalve nozzle or use of a pipe cleaner or paperclip will help remove any build up that has occurred.
• When disassembling the system dip the still-connected AQUAvalve and pipe in hot water to ease separation. Once loosened remove the
pipework by pulling it directly away from the nozzle. Avoid twisting/wiggling the end of the pipe away from the nozzle.
• Do not under any circumstances use a drill to clear the AQUAvalve nozzle. This will potentially damage the AQUAvalve beyond repair.